Many of you who follow me on Google+ or Round.me will have seen the tiny planets I usually post along with my photospheres.
Tiny Planets (also known as little planet) is a Stereographic Down Projection of a photosphere which wraps the 360 sphere into a ball or planet around the nadir point which usually results in some very interesting images.
Some examples of tiny planets

, Vientiane, Laos")
, Vientiane, Laos")


These are a beautiful way to present a photo sphere and are a great idea for wall art (feel free to contact me if you want any prints) and they are very easy to create if you already know how to shoot and edit photospheres. Recently I have had a few people reach out to me on Google+ and ask, “How to create the tiny planet”. As I said these are very easy to create so I will not focus a lot on how to create them but I will share a few tricks I have picked up.
A couple notes before you continue reading; First if you do not know how to shoot and create photospheres you will not be able to create a tiny planet. This post will not cover how to shoot or create photospheres.
Second I will be using PTGui which is paid software but you should be able to get similar results with Hugin (Free) though I am not sure if the steps are the same.
I will be starting with an already created photosphere and will load a single image into PTGui, though you can defiantly do this when you are stitching.
Start off by creating a new project and load either your finished photosphere or load the source images for a new sphere (if you use source images you will need to align the images before continuing.
Switch over to the panorama editor and use the projection menu to select little planet.

Select Little Planet
NOTE: Ensure you select Little Planet and not Steographic Down. The end result will be the same but you may have to make some more adjustments if you use Steographic Down as this may not adjust the resolution of the image.
That’s it, yes it’s that easy, you now have a tiny, or little, planet.
Now I will show you a few tips I have figured out to make these more interesting and visually appealing.
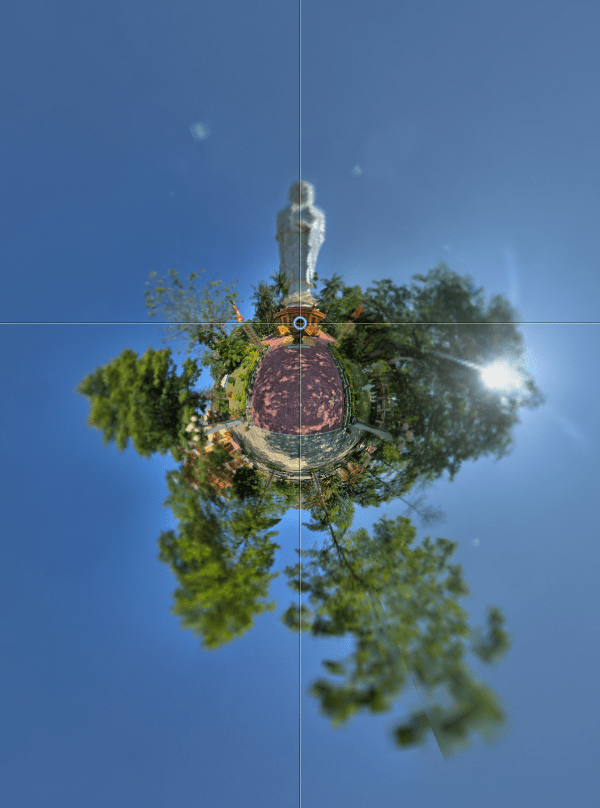
As you can see from the image below this is not ideal; the statue is hanging off the bottom and the tree expands past the edge. There are a few simple adjustments you can do to fix this.
First let’s fix the ostentation so that the statue is standing on top of the planet. To do this switch back the the main window of PTGui and make a few adjustments.
First off you need to make sure advanced view is enabled. The advanced button is located in the upper right corner of the Project Assistant tab in the main window.
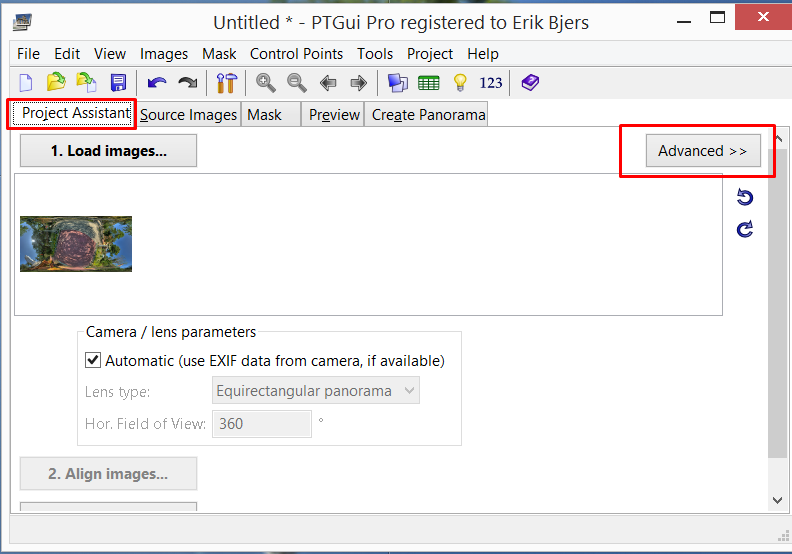
Once you have advanced view enabled you will see Image Parameters, go ahead and select this tab
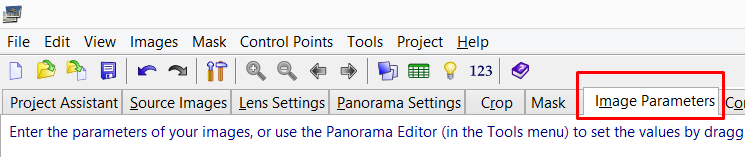
Adjust the Yaw until the orientation is the way you want, you can get the same results by adjusting the roll but don’t adjust the pitch as this will give you different results.
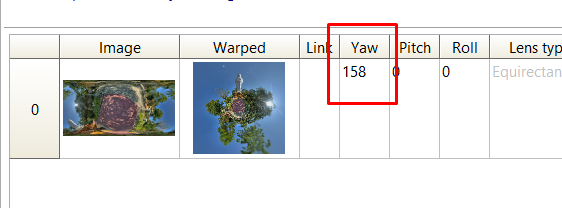
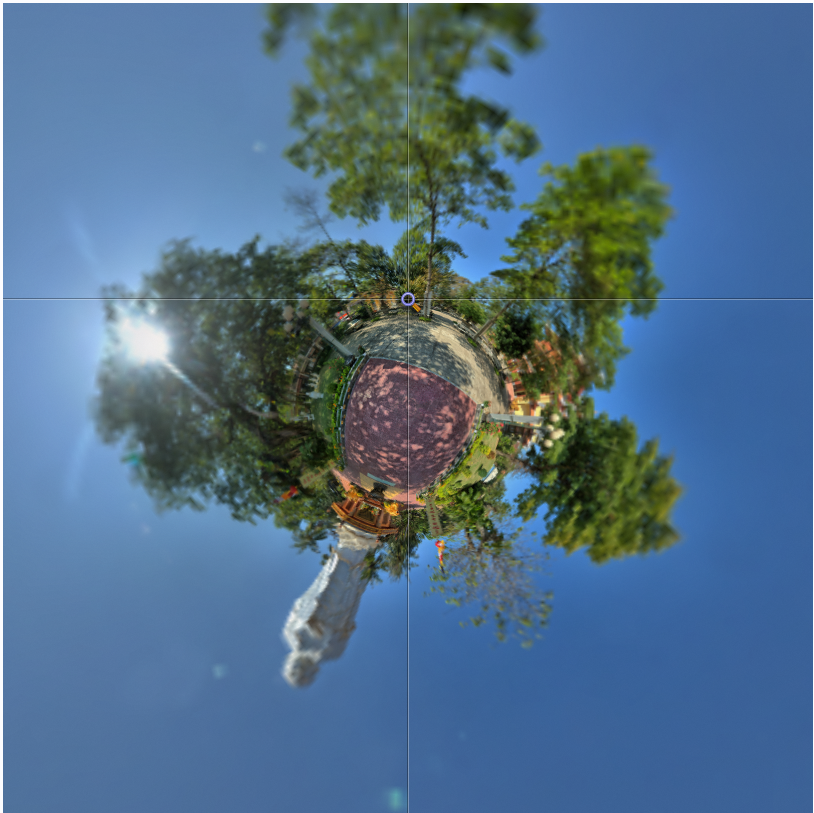
As you can see I used a yaw of 158 which rotated the statue to the top. You can play with the yaw and roll until you get the look you like.
Now let’s see if we can fix the tree hanging off the bottom edge of the image. You need to go to the panorama editor for this.
There are two sliders in the Panorama editor; the bottom slider will make the image wider and shorter and the vertical (right side) slider will make it taller and narrower.
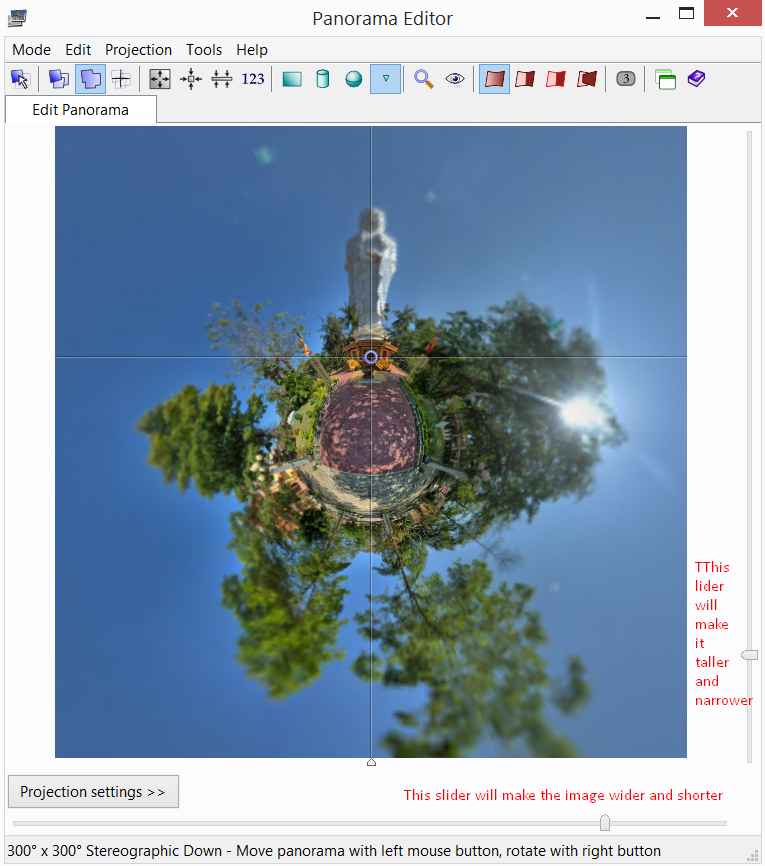
You can play with the two sliders until you get the look you want. In this case I need it to be a little taller so I will just adjust the vertical slider until I get the results I like.
Have fun, play with the projection settings and see what you come up with.
-eb

