Note on this post: I created this using PTGui and PhotoShop on a Windows computer but the techniques should work with other editing software on other platforms, though the menu options may be different. I also assume a certain level of knowledge on how to use the software but if there is anything you don’t understand or would like more details on feel free to leave a comment or contact me through the contact page and I will gladly try to help.
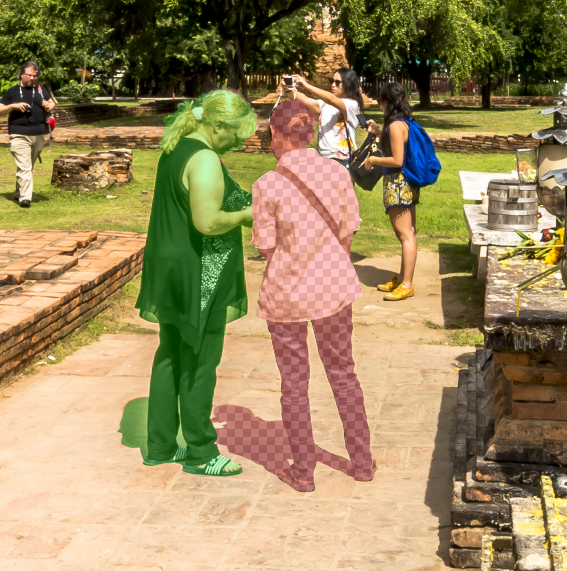
I have found several times when I need to get precise masking of an object in a source image in PTGui when creating a photo sphere but the masking tools in PTGui just are not accurate enough and can be difficult to control unless you have a steady hand. The solution: Photo shop, or your preferred image editor. This technique is good for masking people in or out of a sphere as it allows you to exactly select what you want to mask. For example I want to mask out the person in the white shirt and mask in the person in the black shirt  First thing I need to do is find out what source image is being used, to do this I will show seams in PTGui
  Head over to my source images and I can see that Image 19 is _ECB7850.tif
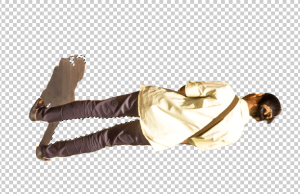
  Now I need to open this file in Photoshop to create my mask. HINT: You can right click on it in source images and select Open Containing Folder to find the file easily. Now that the file is open in PS I will zoom in on my people and start selecting them using the selection tools. I will not go over the best way to select in PS so use whatever method you are comfortable with. Once you have the person, or object, selected create a new layer by copy. Don’t worry if you have a little extra selected, you can erase this in the new layer later. TIP: Don’t forget to include shadows. Once you have your person or object on a new layer, hide the other layers and clean up the selection to remove unwanted areas. I now have my two people on individual layers and we can start creating the mask

First thing to do is create a new black layer above the background but below the selected objects, this will become our new background  Now we need to replace the people we wish to mask with either green (to mask in) or red (to mask out) and of course the easiest way to do this is select everything on the layer, delete it, and fill in the empty space with the color you want to use. TIP: Make sure your color selection is set to web colors only to make things easier
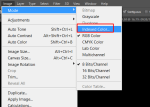
 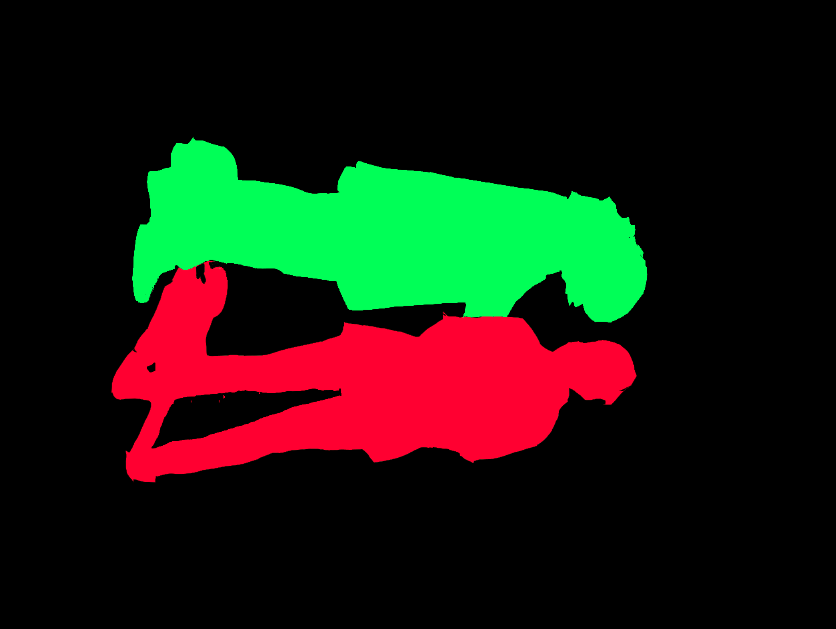 Now we need to format the file, if you skip this step PTGui will not accept it as a valid mask file First thing is to flatten the image and discard the hidden background layer Then you need to change the mode to 8 bit and indexed color
-
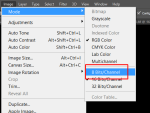
- You must change to 8 bit before you can select indexed color
-
- Select indexed color
-
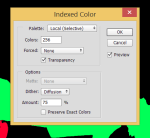
- Accept the defaults
Now simply save your file as a png Return to PTGui and go to the Mask editor for the desired image Right click on the image and select Load Mask Select the png file you just created and you will see the mask applied to the image  It seems I picked a bad example as these two people are in images 7, 8, 9, 17, 18, 19, 27, 28, and 29 so I am not able to actually get this mask to work without getting empty space in the final but as you can see by the above image the masking has been applied to the source image in PTGui.
I am not going to show you the final result because it did not come out good due to the people being in so many images. Give this a try for yourself and see if you can make it work.
Fell free to post your results in the comments.
-eb

