
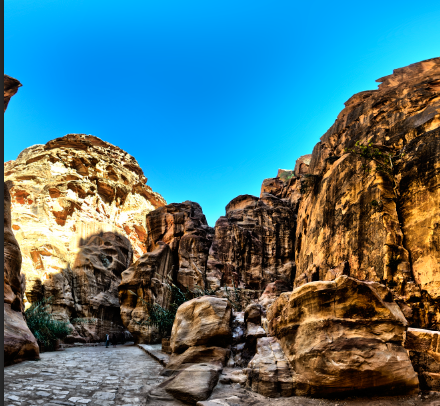
I often have problems getting a smooth clear blue sky when working with HDR spheres, I often end up with dramatic transitions between the shades of blue in the sky resulting in various shades of blue stripes across the sky. As you can see in the picture below this is not exactly desirable and distracts from the overall sphere.
NOTE: I intentionally overdid the HDR on this one so that the sky issues are more apparent.
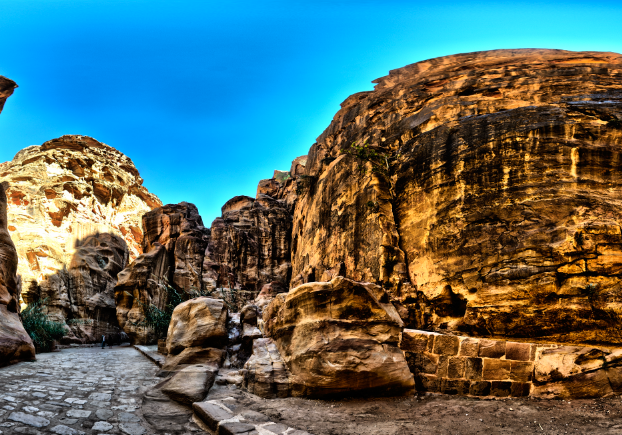
See the uneven transitions in the sky
The fix to this problem is actually rather easy if you have some photo editing software such as; Photo Shop, Photo Shop Elements, or GIMP. I am using Photo Shop but the technique should work equally well in the other editors.
Create Layers
The first thing we need to do is create 3 different layers; 1) the background with everything (this one already exists… it’s the actual picture), 2) the sky, and 3) everything that is not the sky.
The easiest way to do this is to select the sky, as it has the most “consistent” color. I am using the magic wand tool in PS but you could also use the magnetic lasso or any other selection tool you like.
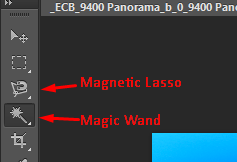
Selection tools in Photo Shop CS6
Using the magic wand select the entire sky by using the add to selection mode, this way you can click on different shades of blues until the entire sky has been selected. You can also use things like select similar and grow by right clicking to make your selection easier.
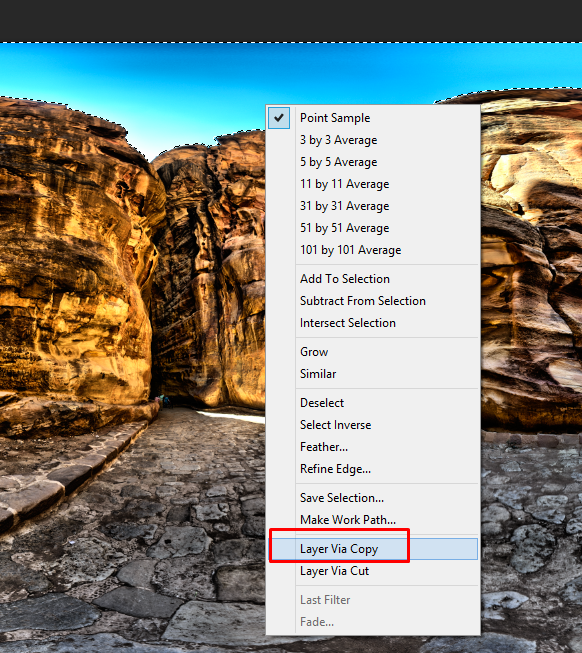
Once you have the entire sky selected copy the selection to a new layer. In PS this is done by right clicking on the selected area and selecting copy to new layer
Now we need to create the 3rd layer with everything else and the easiest way to do this is.
1) Select the new layer and select everything
Make sure the sky layer is active and use CTRL+Click to select everything
2) Select the background layer, right click on the selected area and select invert selection

Make sure the background layer is active
3) You now have the the background selected and can right click and select copy to new layer
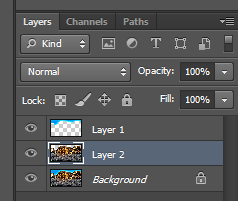
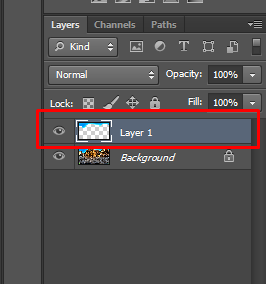
You should now have 3 layers
Now we need to change the order of the layers so that the sky is in the middle, this is easily done by dragging layer 2 up or layer 1 down
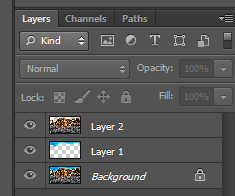
Put the sky layer in the middle
Smooth out the Sky
Make the sky layer active and select everything again, it can be helpful to hide the other layers at this time but it is not required.
Apply a Gaussian blur to the sky layer to smooth it out. This is found on the filter menu in PS

Apply a Gaussian blur to the layer
Adjust the radius until the sky transitions begin to look smooth
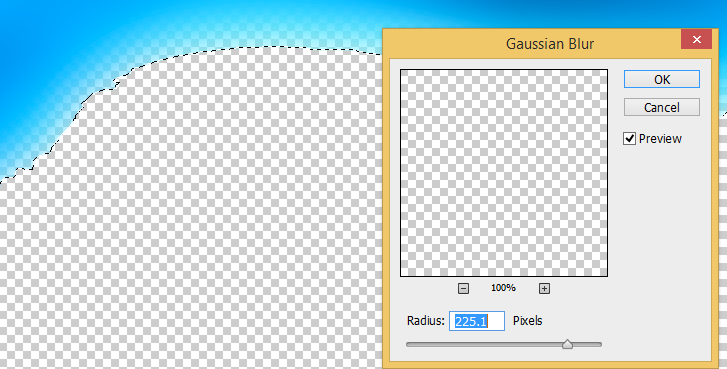
Adjust the radius
Make the other layers visible again and you should now see a much smoother sky.
You now have a smoother sky
A couple notes on this technique:
1) If you have clouds or sun in the sky this technique may not work but you can try erasing these items from the sky layer before applying your blur and then adjust the transparency of your sky layer until the sun or clouds look good through the blurred sky layer.
2) When adjusting a sphere in any editors after stitching it you run the risk of creating a seam but I have not had this issue yet.
Hope you found this how to useful, please let me know if there is anything else you want to know how to do… if I know I will share.
-eb

